Review & decide
Decisions are two steps on purpose: stage them all, read the list once, then send.
Open Submissions. Two rows of tabs: what a thing IS, then where it stands.
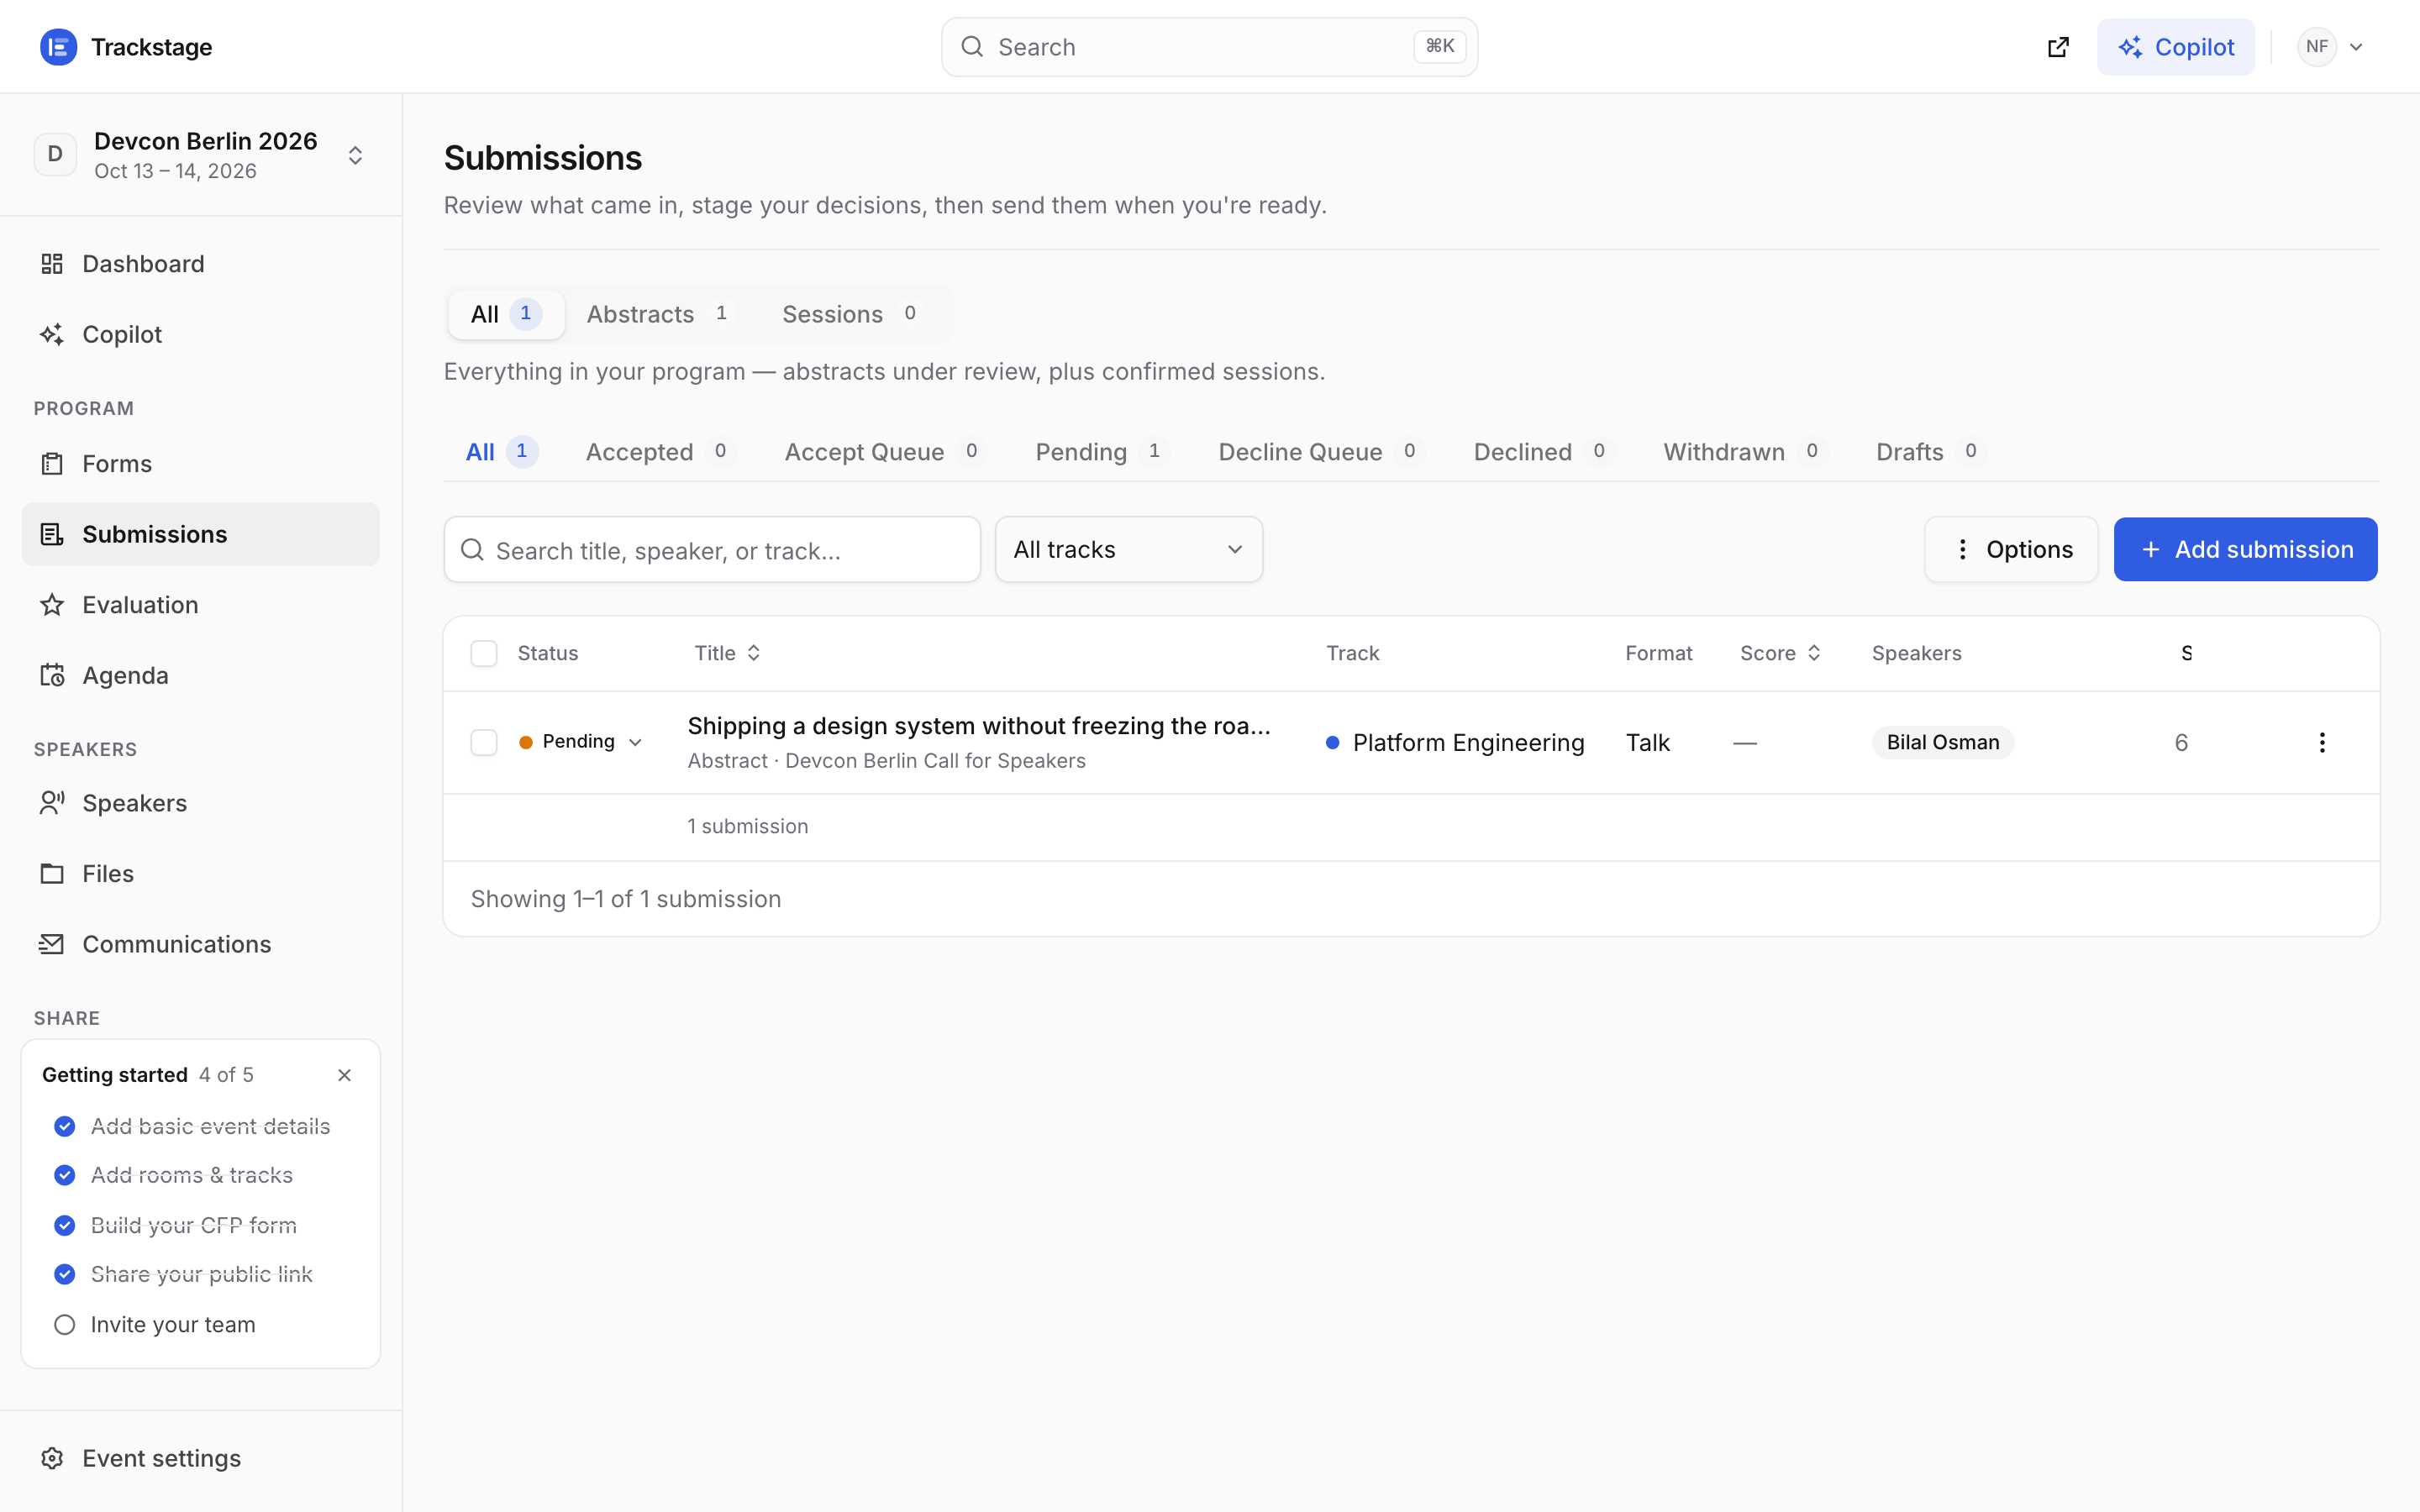
Top row: All · Abstracts · Sessions. Second row: the pipeline. Search and a track filter sit above the table. Abstracts arrived through one of your forms and are waiting on you. Sessions are things you added yourself — keynotes, sponsor slots, breaks — and they start out accepted. The second row is the pipeline every abstract moves along: All, Accepted, Accept Queue, Pending, Decline Queue, Declined, Withdrawn, Drafts. The two combine, so “Abstracts + Pending” is one click.
Click a row to read the whole thing. The drawer has five tabs: Details, People, Reviews, Files and History.
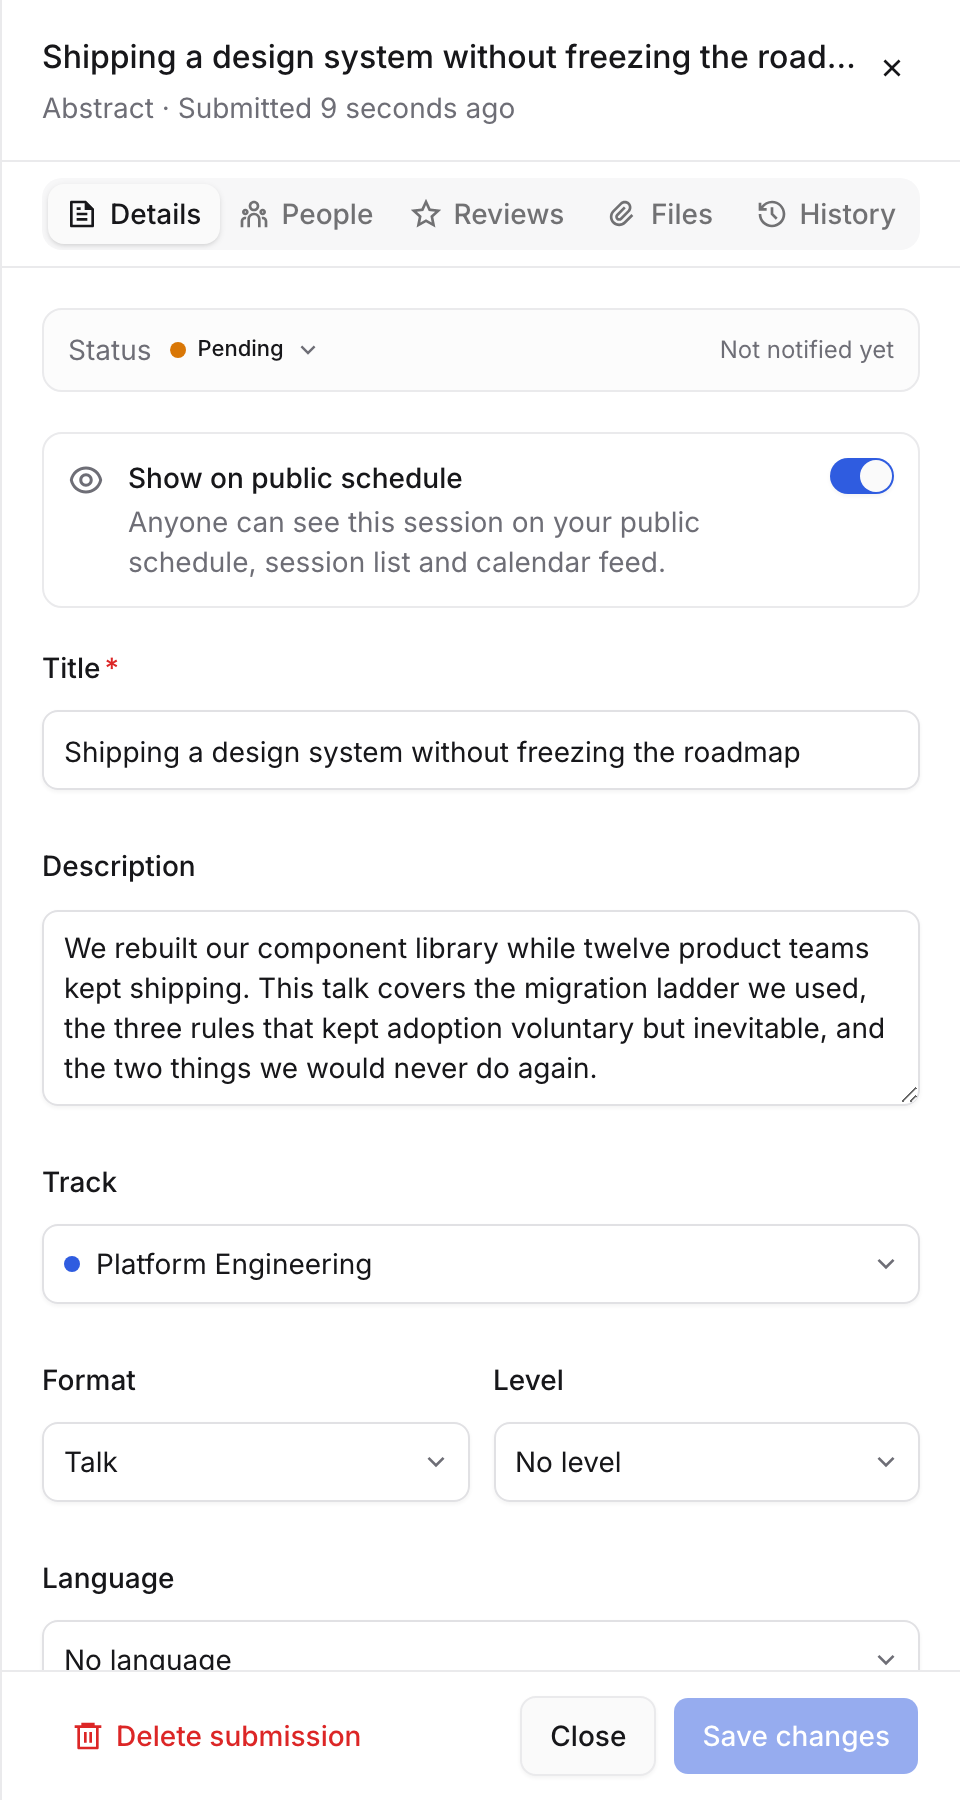
Everything is editable in place, including the status pill at the top. Click that status pill and pick where it goes. One click applies it — there is no Save.
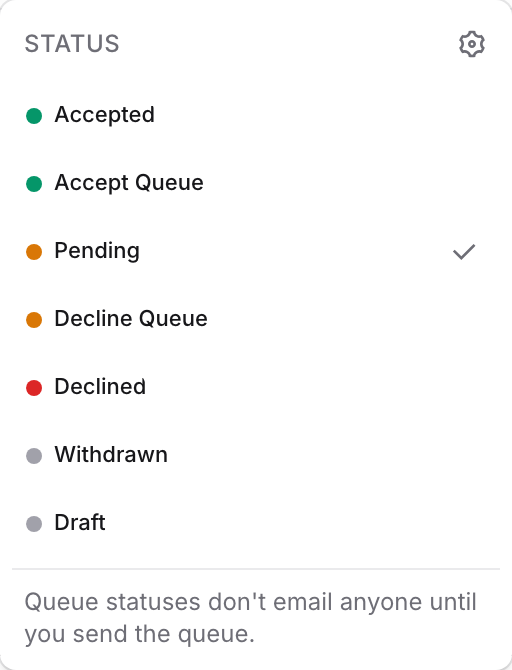
The same picker sits in every row of the table, so triage is one click per submission. A toast confirms each one, and re-picking is one click back. That is safe because picking a queue only stages the decision — the note at the bottom of the picker says so. The speaker sees nothing, hears nothing, and their portal keeps saying Pending. The list here is your own: rename the built-ins or add one of your own (a “Waitlist”, say) under Event settings → Statuses, reachable from the gear in the picker’s corner.
A banner counts what is staged. Read the queue one last time — this is the only moment it costs nothing to change your mind.
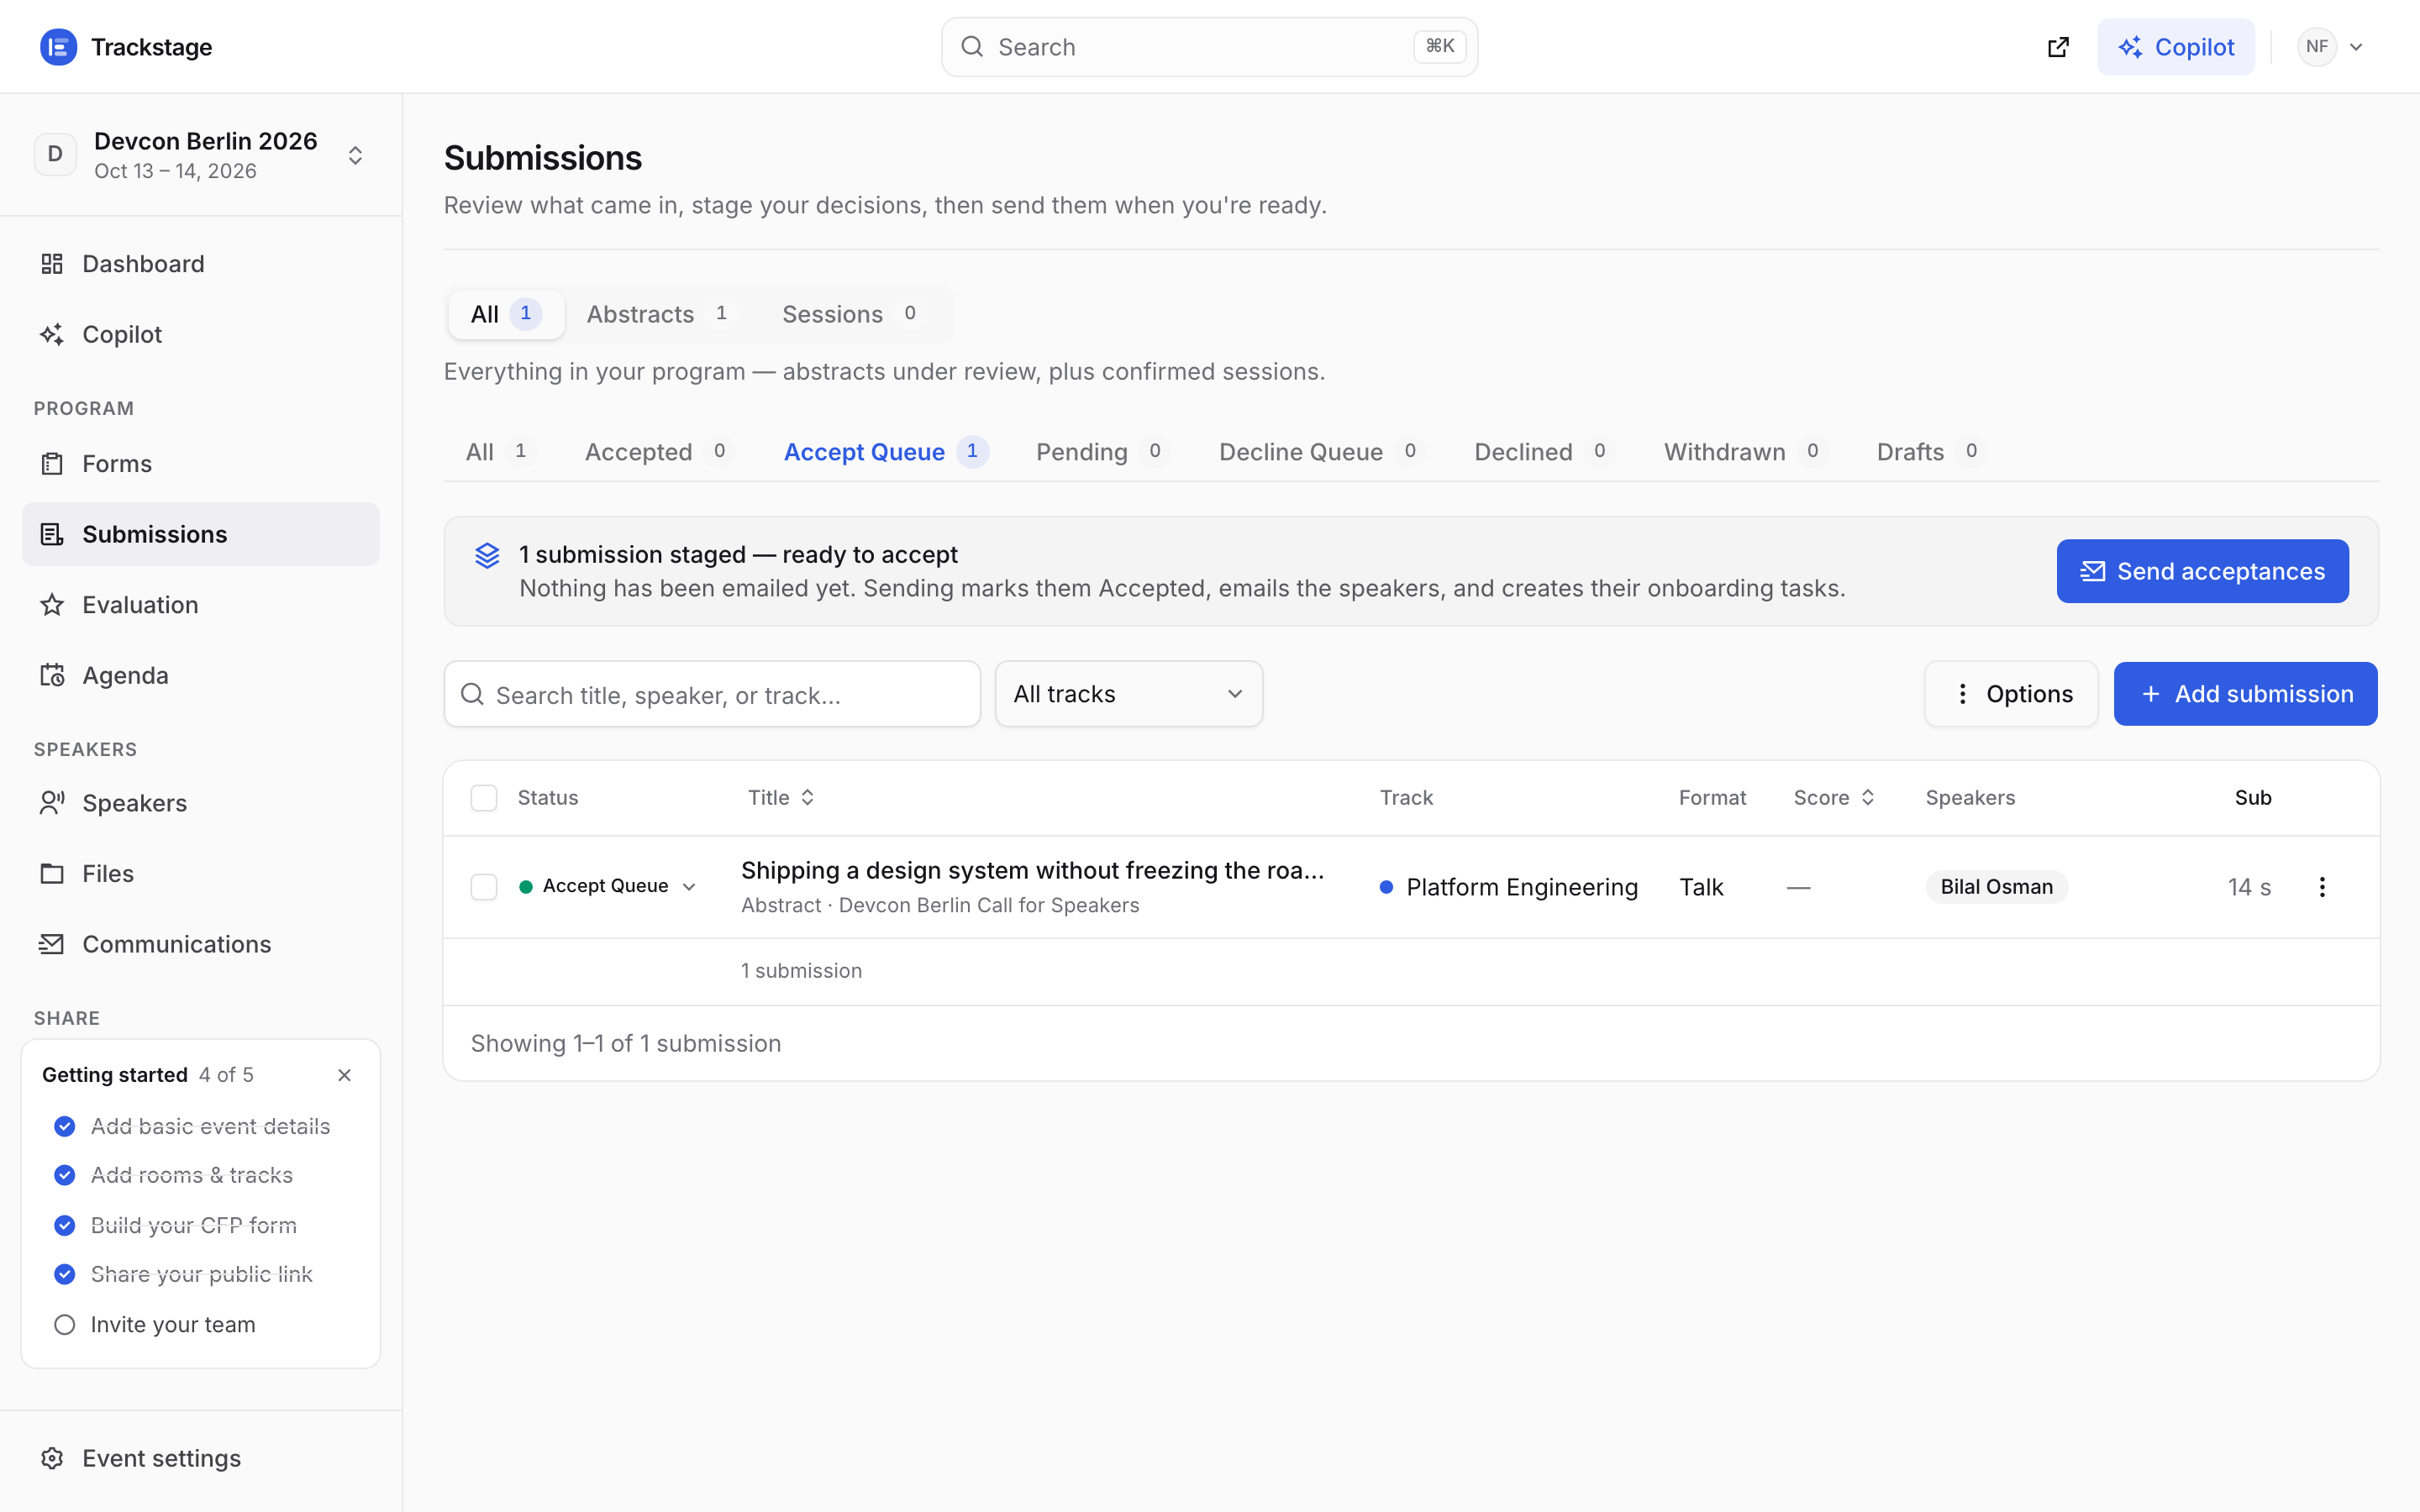
Tick several rows to stage them in one go: a bar appears with the same statuses on it. Press “Send acceptances” (or “Send declines”) and confirm.
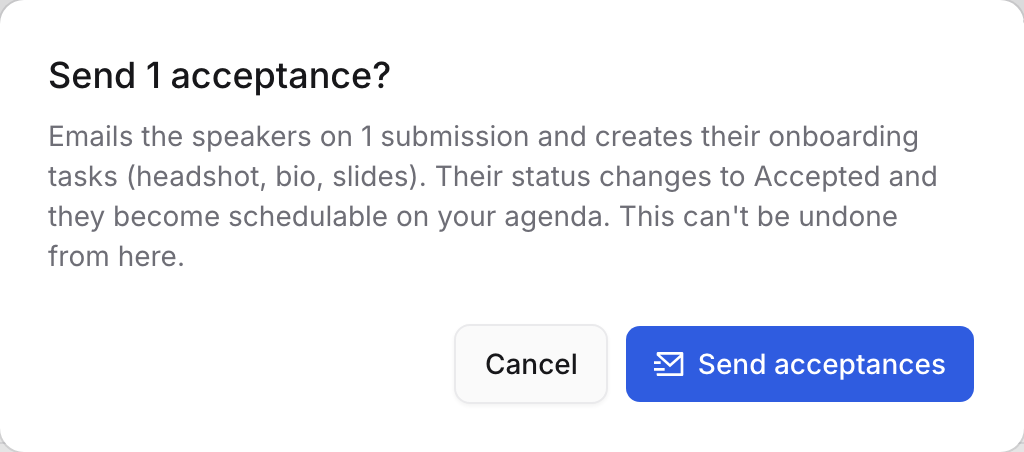
The dialog counts what is going out. Accepted speakers also get their onboarding tasks created. At a real event this table runs to hundreds of rows — same tabs, same two-step decision, plus filters to cut it down.
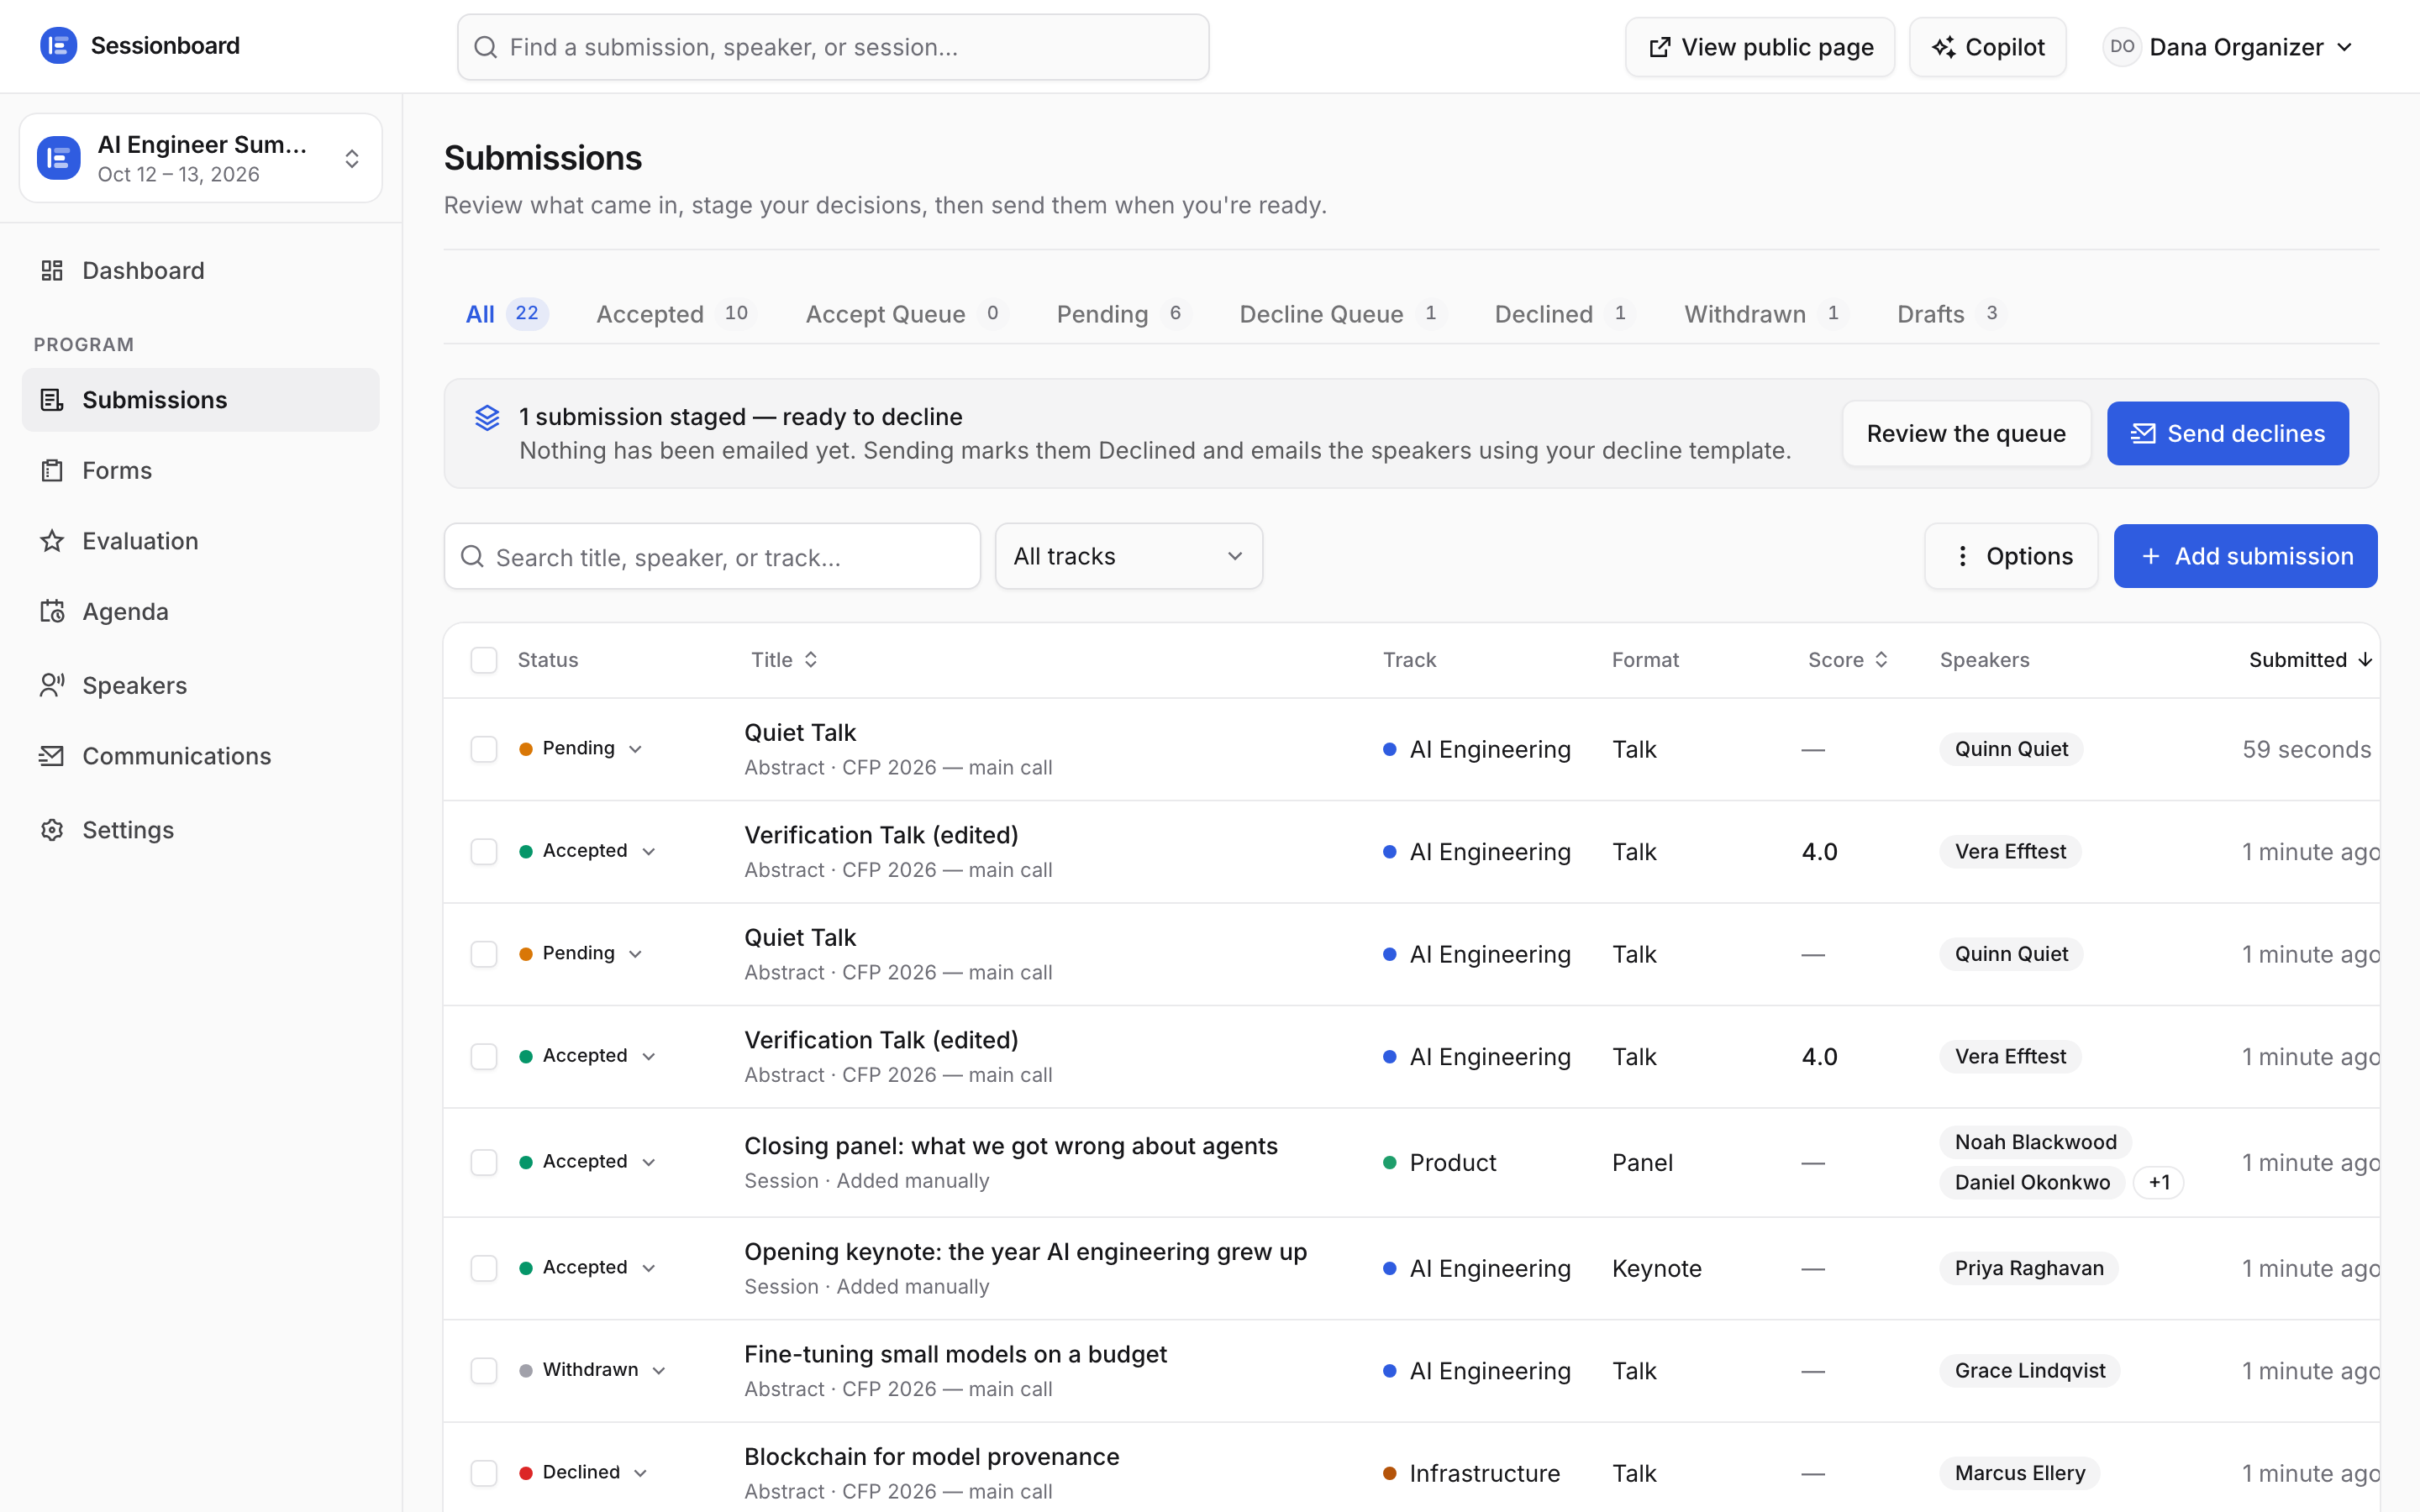
A different, busier event, narrowed to Accepted in one track. The counts on both tab rows always report the whole event.